
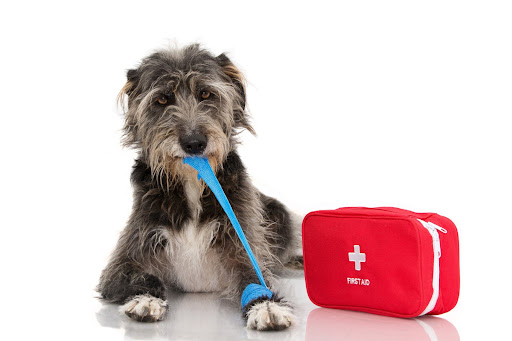
Most dogs break a bone or two in their lifetimes. If your dog recently suffered a broken bone and you still have crutches or casts around the house, you can use them to make homemade splints for dogs.
But can you? Can you make a homemade dog splint strong enough to hold up all that extra dog fur?
Absolutely! Check out our guide to homemade dog splints and how to make a splint at home.
Table of Contents
Measure and Prepare
Before creating the splint, it’s crucial to assess your dog’s injury carefully. Gently palpate the injured area to identify any swelling, deformities, or signs of pain.
Measure the length and width of the area that needs splinting to ensure that your homemade splint will provide adequate support without causing discomfort. Remember that the splint should extend beyond the injured area for better stability.
Once you have assessed the injury and measured the required dimensions, gather all your materials and make sure you have everything you need readily available. It’s essential to work efficiently and calmly during this process to minimize stress for both you and your dog. If possible, have someone assist you in holding or comforting your dog during the splinting process.
Cut the Rigid Material
Choose an appropriate rigid splint material, such as a thin wooden board, PVC pipe, or cardboard. Use a saw or scissors to cut it to the desired length and width. Ensure that the edges are smooth and won’t cause any discomfort or irritation to your dog’s skin. The size and shape of the rigid material should match the dimensions you measured earlier to provide proper immobilization while avoiding unnecessary pressure on the injury site.
If using cardboard, you can layer multiple pieces to increase rigidity. Consider reinforcing the splint with additional layers of material if your dog is particularly active or if the injury requires extra support. Remember that the splint should be lightweight but sturdy enough to prevent movement of the injured limb.
Pad the Splint
Padding the splint is essential for your dog’s comfort and to prevent pressure sores or irritation. Use soft materials such as cotton padding, foam, or a folded towel to create a cushioning layer. The padding should be applied to one side of the rigid material. Cut the padding material to match the dimensions of the rigid material and attach it securely.
To secure the padding, use adhesive tape or an adhesive bandage. Ensure that there are no wrinkles or folds in the padding that could create wound pressure points. The goal is to provide a soft, even surface for your dog’s limb while maintaining the integrity of the splint’s structure.
Secure the Padding
After attaching the padding, it’s crucial to make sure it’s securely in place. Ensure there are no loose or shifting portions of padding that could cause discomfort or pressure points. Smooth out any wrinkles or folds in the padding material, as these can lead to skin irritation over time.
Using adhesive tape or an adhesive bandage to secure the padding is essential. Place the tape or bandage evenly along the edges of the padding to prevent it from shifting.
Be gentle during this process to avoid any unnecessary pressure on the injured area. A well-padded splint not only enhances comfort for your dog but also provides better support and helps maintain proper alignment of the injured limb.
Place the Splint
Carefully position the prepared splint against the injured area. Ensure that the injured limb is in the desired position for healing, as advised by your veterinarian. The splint should immobilize the injured area while allowing room for normal circulation and movement of the non-injured parts of the limb.
It’s essential to be gentle and patient during this step, as your dog may experience discomfort or anxiety. Use treats or positive reinforcement to keep your dog calm and cooperative. Having an extra set of hands to assist you in holding the splint and soothing your dog can be immensely helpful.
Wrap with a Sock or Cloth
Cover the splint and the surrounding area with a clean sock or cloth. This serves several purposes, such as keeping the splint clean, preventing your dog from chewing or licking it, and adding an extra layer of protection and comfort. Ensure that the sock or cloth is clean and free of any potential irritants.
Cut or fold the sock or cloth as needed to fit snugly around the splint. Be careful not to wrap it too tightly, as this could interfere with circulation or cause discomfort. Secure the sock or cloth in place, making sure it’s snug but not constricting.
Secure with Bandages or Vet Wrap
To secure the splint in place, use bandages or vet wrap. Begin by wrapping the material around the splint gently, starting at the top and working your way down. Be careful not to wrap it too tightly, as this could impede circulation and cause discomfort. You should be able to slip a finger underneath the bandage without much resistance.
Make sure the bandage or vet wrap is snug enough to hold the splint securely in place but not so tight that it causes any indentations or discomfort to your dog. Pay special attention to the areas above and below the splint, where you may need to create anchor points to prevent slipping.
Monitor Your Dog
After applying the homemade dog splint, it’s essential to monitor your dog’s progress and well-being closely. Keep a watchful eye on the splinted area to ensure it remains clean and free from irritation or pressure sores.
Check for any signs of swelling, redness, or discharge around the injury site. To ensure you have the necessary financial support for any unexpected medical expenses, consider reaching out to and comparing options from the best pet insurance companies.
Additionally, monitor your dog’s behavior and comfort level. If your dog appears to be in pain, is consistently trying to remove the splint, or shows signs of distress, consult with your veterinarian promptly.
Creating a Homemade Dog Splint With Love
Overall, making a homemade dog splint can be a feasible option for minor injuries. However, it is important to remember to consult with a veterinarian for more serious injuries. With proper materials and techniques, you can create a temporary splint for your furry friend while seeking professional assistance. Will you give it a shot to help your pup in need?
Did you find this article helpful? If so, be sure to check out our blog for more informative content like this.